
Kubernetes is an open-source container orchestration system for automating the deployment and management of containerized applications. Kubernetes provides capabilities like service discovery, horizontal autoscaling, and load balancing, while ensuring that application configurations are declarative and that systems are self-healing.
In this article, I will explain how to monitor your Kubernetes cluster and implement automated health checks, and discuss the various monitoring tools available.
Monitoring Challenges with Kubernetes
Monitoring is one of the top challenges for organizations that embrace Kubernetes as their container orchestration platform.
A Kubernetes ecosystem has significantly more moving parts than a traditional monolithic on-premise environment, which can make monitoring and troubleshooting more complex. In such a dynamic environment, where containers and pods are constantly being created and deleted, it’s a challenge to keep track of components and to have complete observability.
In order to have confidence in your deployed applications, you’ll need your Kubernetes monitoring solution to provide full visibility into the health of your deployed applications, containers, and underlying infrastructure.
The Kubernetes Client
Kubectl is a command-line interface that you can use to interact with your Kubernetes clusters. You can download and install the kubectl client binary to run basic and advanced commands and get a quick insight into the Kubernetes cluster.
In this section, I’ll show you how to use the kubectl tool to monitor your Kubernetes cluster.
Cluster Action | Use This Kubectl Command |
Get the list of all namespaces in the cluster. |
|
Create and use a custom context. |
|
View Kubernetes resources in the cluster. |
|
Get information about a specific resource. |
|
Get resource information with some additional parameters. |
|
Get detailed information about cluster resources. |
|
Get node resource usage. |
|
Get pod resource usage. |
|
View logs for a container in a pod. |
|
You can learn more about managing logs in Kubernetes and different types of logging architectures here.
Kubernetes Health Checks
You can implement health checks in Kubernetes and apply automatic remedial measures to increase the application’s resiliency. The liveness and readiness probe are used to control the health of the application running inside a pod’s container.
I would highly recommend that you add the liveness and readiness probes to your deployment so that Kubernetes can take action in an automated fashion if the application is not healthy. You can add both these probes to the “containers” section of the pod specification.
Liveness Probe
If the liveness probe fails, this indicates that the application is not responding or is in a failed state from which it cannot recover by itself. In such cases, Kubernetes will automatically restart the offending pod.
You can add a basic HTTP probe to the pod specification, which the kubelet can use to restart the containers if the health check probe fails.
In the configuration file below, I have configured the kubelet to perform a liveness probe every two seconds. I have also added an initial delay of three seconds in performing the first probe. If the request returns an error code, the kubelet will terminate the container and automatically restart it.
We know tech blogging.
apiVersion: v1
kind: Pod
metadata:
name: liveness-iod
spec:
containers:
- name: liveness
image: iod/livenessProbe
livenessProbe:
httpGet:
path: /health
port: 8080
initialDelaySeconds: 3
periodSeconds: 2
Readiness Probe
If the readiness probe fails, this indicates that the application is not ready to accept client requests. In such cases, Kubernetes stops sending traffic to the offending pod until the readiness probe passes.
You can add a basic HTTP probe that the kubelet can use to identify when a container is ready to accept traffic. The load balancers will evict the pod if it is not ready and won’t route any traffic. The readiness probe configuration is nearly identical to the configuration of the liveness probe, but you will need to use the “readinessProbe” field instead of the “livenessProbe” field.
apiVersion: v1
kind: Pod
metadata:
name: readiness-iod
spec:
containers:
- name: readiness
image: iod/readinessProbe
readinessProbe:
httpGet:
path: /health
port: 8080
initialDelaySeconds: 3
periodSeconds: 2
Resource Utilizations of Pods
To ensure the smooth functioning of the pods in your Kubernetes cluster, it is essential to configure their resource requests and limits. If you create your pods without paying attention to the CPU and memory resources, the results might not be optimal. Please keep in mind that the pod’s resource requests and limits are the sum of all its containers’ requests and limits. The Kubernetes scheduler uses these computational resources to schedule the pods on a node.
Resource Requests
When creating your pod, you can specify the minimum amount of CPU and memory that an application container needs. Kubernetes uses these metrics to schedule pods across the available nodes in the cluster.
Resource Limits
When creating your pod, you can specify the hard limit of CPU and memory that an application container may consume. This helps Kubernetes ensure that pods act as “good neighbors” and do not affect other pods by consuming too many resources.
Here is the configuration file for a pod showing resource requests and resource limits for a container:
apiVersion: v1
kind: Pod
metadata:
name: iodblog-demo
namespace: iodblog-ns
spec:
containers:
- name: iodblog-ctr
image: iodblog
resources:
limits:
memory: 4GB
cpu: 1000m
requests:
memory: 2GB
cpu: 500m
Kubernetes Monitoring with Prometheus
Prometheus is an open-source metrics-based monitoring system that helps you analyze how your application and infrastructure are functioning .Prometheus uses service discovery to scrape targets.The application metrics can be scraped via an exporter and stored in a time-series database. You can query this data using PromQL or view it in Grafana dashboards.
Prometheus is a pull-based monitoring system, and hence, your services don’t need to be aware of where the monitoring system is hosted. They just need to expose the metrics via an HTTP endpoint, and Prometheus can pull metrics from it. Prometheus also has a flexible, multidimensional data model that allows you to collect data and query it in a highly reliable way. This data can then be leveraged for monitoring and troubleshooting purposes.
Prometheus has built-in integration with Alertmanager, which allows you to send notifications to teams when thresholds are not met. Alertmanager performs custom handling of alerts by grouping, deduplicating, and silencing alerts, and routing them to integrations like email, Opsgenie, and PageDuty.
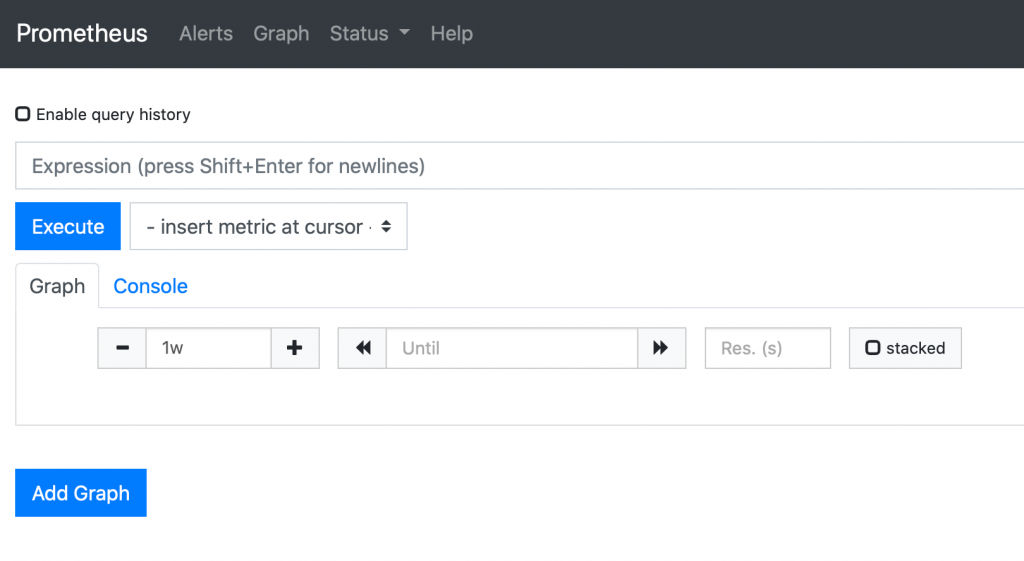
You can leverage the Prometheus expression browser to run PromQL queries to view the data stored inside Prometheus.
With the increased adoption of containers and microservices architectures, the number of components to manage and monitor has also increased. Prometheus is the best tool available for collecting data from such dynamic environments, storing them in a time-series data store, and providing monitoring capabilities for your applications deployed in Kubernetes and for the underlying infrastructure.
Kubernetes Data Visualization with Grafana
Grafana is an open-source data visualization tool that provides you with in-depth visibility into the health of your Kubernetes cluster and the applications running in it.
You can leverage Grafana dashboards to monitor both system-level and application-level metrics such as:
- Overview of nodes, pods, and containers.
- Actual CPU/memory usage of Kubernetes cluster nodes.
- Health status of Kubernetes master node components (API server, scheduler, controller, etcd).
- Node disk I/O usage.
- Node network in/out traffic.
- Pod health and availability.
- Resource allocation for pods.
- Requested usage vs. actual usage of resources.
- Container restarts and percentage of throttled containers.
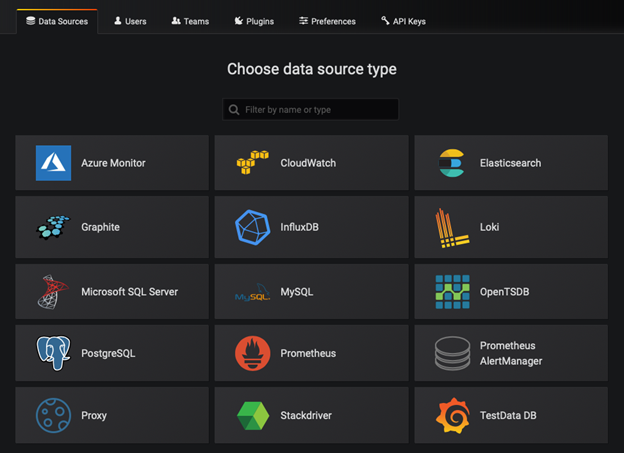
Grafana supports a number of data sources out of the box, like Prometheus, Elasticsearch, InfluxDB, AWS CloudWatch, and Azure Monitor. While building your custom dashboards in Grafana, you can combine data from multiple sources and consolidate them into a single dashboard. You can also associate a panel with a specific data source to provide visualizations.
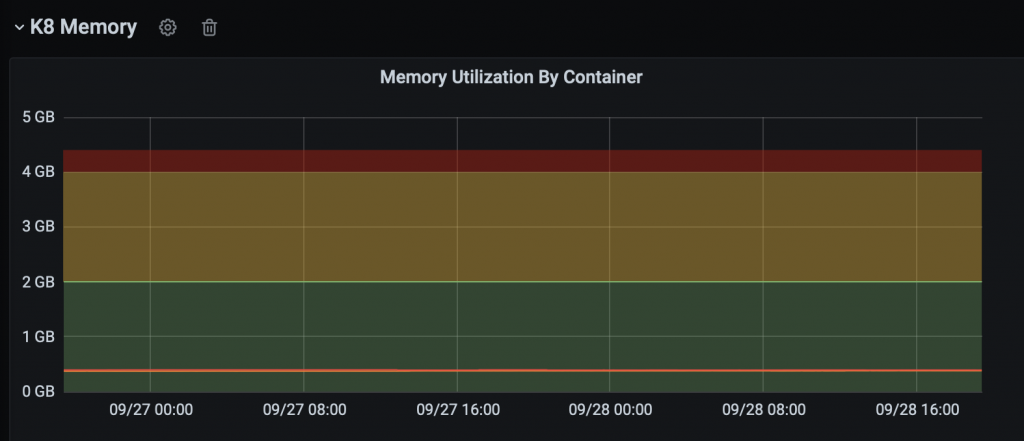
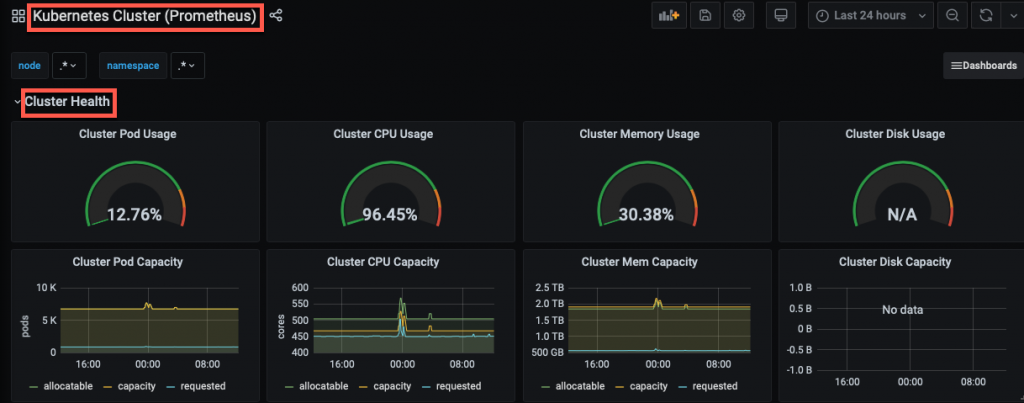
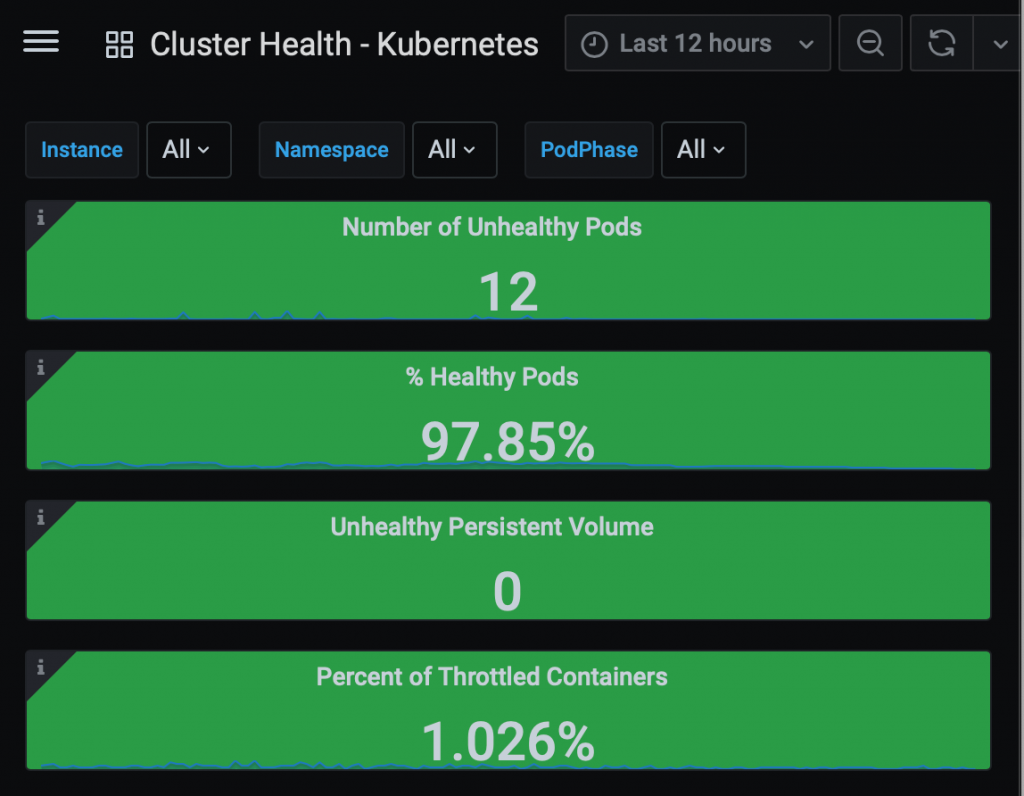
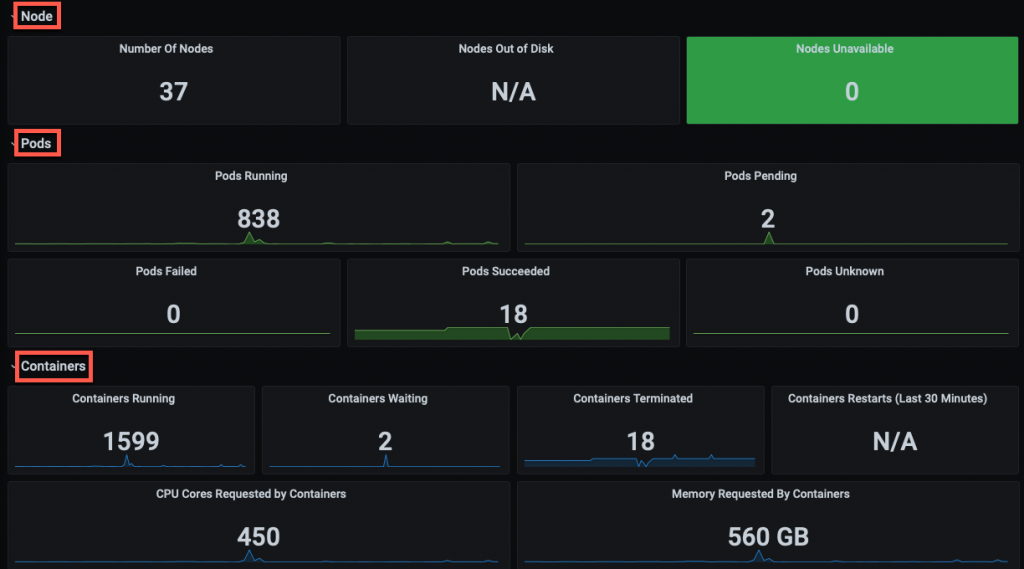
You can create a Grafana dashboard displaying summary metrics for monitoring the health of the Kubernetes cluster and identifying any workload bottlenecks. Below are screenshots of a few dashboards you can use to track your cluster resources. For custom monitoring, you can use one of the community-built Grafana dashboards.
Kubernetes Monitoring Simplified
Monitoring is critical for gaining an in-depth understanding of how your Kubernetes cluster is functioning. In this article, I explained different ways to monitor your Kubernetes cluster and pods. Using the Kubernetes command-line interface, you can dive deep into cluster resources. With liveness and readiness probes, you can implement automated health checks, and with Prometheus and Grafana, you get one of the most effective monitoring solutions for Kubernetes.
