Until spring 2020, a lack of OS support from Microsoft rendered Linux container images as the only viable option for Kubernetes container deployment. Microsoft, however, has since made great strides in bringing Windows containers into the mainstream. Today, Windows containers are available and officially supported on the Azure Kubernetes Service, with general availability as of April 2020.
The release of Kubernetes V1.18 has enabled the creation of Windows containers that support process isolation and Hyper-V isolation. Previously, Kubernetes had supported the orchestration and deployment of Linux-based containers alone, making this a welcome addition.
With full support from the major cloud hosting providers, Windows containers can now be created on the Azure Kubernetes Service (AKS), the Google Kubernetes Engine (GKE), or the Amazon Elastic Kubernetes Service (EKS).
Kubernetes is a popular method for deploying serverless containerized services, and the progress made by Microsoft during 2019 and 2020 has brought serverless Windows containers into the mainstream. With single-machine K8s hosting and hybrid-cloud K8s container orchestration being a focus point for Microsoft, Kubernetes has never been more agile or accessible.
For those accustomed to Linux-based containers, there are a few things to be aware of when working with Windows-based containers. First, Windows container ISOs are much larger than their Linux counterparts and thus have greater storage requirements and longer deployment times. In addition, issues related to kernel sharing with process-isolated containers on Windows can complicate configuration and management.
Differences Between Windows and Linux K8S Containers
Before creating a Windows container, it is important to be aware of current limitations with the technology. While many of the processes involved in managing Linux containers apply to Windows containers as well, there are some differences that should be noted.
Are you a Kubernetes user? The author of this blog is one of our top tech experts. You can be one, too! Join us and write blogs for IOD.
Container Layer Size
As previously noted, Windows container images have a much larger file size than container images in Linux. The smallest Windows Docker container image size (after installation) is currently 2.63 GB using a Windows Server Core Insider v1903. In comparison, a purpose-built Kubernetes Linux distribution, k3S, can be used with a binary size of less than 100MB.
While the size of the base image is not important, the size of your container layers will impact disk usage. Since Docker works to create container layers, the base container image will be full size, with Windows, for example, using 2.63 GB of space. Next, Docker creates a layer with the required binaries and files for the task assigned to each container. This is in order to limit scratch disk usage at the container layer.
In summary, Linux container images are leaner than their Windows counterparts, resulting in less disk usage when scaling large numbers of containers. This Microsoft Container Storage documentation provides useful info for understanding how to manage Windows container layer disk usage.
Greater Attack Surface with Windows
Another important issue to address is the increased attack surface that comes with larger Windows Docker container images. Even the smallest Windows container image, Nano Server, has far more dependent services than Linux. While Microsoft has taken measures to debloat its container images, Windows containers are still far from being lean like Linux containers.
Even more concerning, in July 2020, cybersecurity authority Unit 42 revealed it had discovered a Windows container exploit using symbolic links on Windows. If the container supports use of undocumented flags, symbolic links can resolve outside of the container on the host machine root directory. This presents an entry point for attackers, allowing them to exploit containers to break into the host machine. After a simple DLL injection, Unit 42 was immediately able to access host system files. Developers should be aware of these security issues so they can configure their Windows containers correctly.
Hardware Requirements and Vendor Support
While Microsoft has made significant progress, Linux container hardware requirements are much lower than Windows containers, requiring only 512 MB of RAM and a single CPU or vCPU on the host machine. In comparison, when using Hyper-V and nested virtualization for Windows Docker containers, the host machine will require at least 4 GB of RAM.
Thankfully, in June 2020, Microsoft updated their nested virtualization technology, which had previously only supported Intel processors with VT-x. Now, it is possible to leverage AMD processors using AMD-V, a welcome addition in light of the growing popularity of EPYC server chips.
Windows Host OS Compatibility with Underlying Container Images
Older Windows Server images lack support for such features as container process isolation, which is included with the latest Windows Server 2019 v2004. Process isolation helps Windows achieve parity with Linux containers, with isolation being achieved via namespace, resource control, and process isolation.
Windows host images and Windows container images must have the same build or revision number, depending on your host OS version. This means a Windows Server 2019 host machine with the build number 19041 can run Windows container images with the same build number. However, Windows Server 2019 with the build number 17763 cannot run a Windows container image with the build number 18363, even if they both use the same major release version.
Microsoft therefore blocks Windows containers from starting if the host and container OS build numbers do not match. This does not apply when using Hyper-V, as the container will have its own Windows kernel instance. If using Windows Server 2016 as a host OS, these rules also apply to revision numbers. Build and revision number matching is therefore an integral part of Windows container management.
Windows and Linux Compatibility
Another important consideration when running containers on K8s is compatibility across Windows and Linux. While Linux containers can be hosted on Windows Server, Windows containers cannot be hosted on Linux. Those who wish to adopt Windows container technology are thus forced to manage an additional Windows Server environment.
Scaling Up and Out
One of the greatest benefits of using Kubernetes is container scaling. There are two methods for scaling with Windows containers.
- Scaling up: Scaling up Windows containers involves upgrading your host machine to have increased CPU, memory, and disk I/O allocations. This is typically done by purchasing an upgraded VM instance tier from your cloud provider and then lifting and shifting your Kubernetes cluster to the upgraded VM instance. For containerized applications running on a serverless platform, this scaling up can be achieved automatically if using Azure Functions Serverless. Otherwise, you would simply create an upgraded VM instance, and lift and shift as noted here.
- Scaling out: Scaling out involves adding extra compute nodes to your node pool and spreading workloads between these individual workers. A compute node is simply a VM instance to which you assign workloads, and here, scaling out divides larger workloads between multiple worker nodes. You can also do a manual scale out by changing your configuration settings in Kubernetes, allowing Azure to natively interface with and manage your AKS instances.
Microsoft also offers the Horizontal Pod Autoscaler, an Azure native service that monitors for pod resource usage. It then scales pod replicas up and down, or provisions new pod replicas to match your Windows container resource requirements.
Similarly, AKS Cluster Autoscaler can automatically scale K8s cluster nodes to meet demand. This is achieved by adding and removing virtual machine nodes as demand fluctuates, within the AKS service specifically.
How to Create a Windows Container on AKS
By now, you should have a better understanding of the nuances of Windows container management. Next, we’ll turn to preparing your environment and testing Windows containers using Docker.
Preparing Windows Server and Installing Docker
Before using a Windows container image, you need to prepare your Windows Server installation to run containers. Microsoft offers a guide detailing how to obtain an evaluation copy of Windows Server and install Docker so that it is ready to run a container.
Windows Container Options
There are four options to choose from with Windows containers:
- Windows Server Core: Windows Server Core is built to support traditional .NET framework applications. This is a stripped-down CLI-only version of the traditional Windows Server OS. Additional details on the Server Core installation are available on the Microsoft website.
- Windows Nano Server: Windows Nano Server is a more stripped-down version of Windows Server Core. It only supports .NET Core applications and does not include Powershell, Windows Management Instrumentation (WMI), or the Windows Servicing Stack.
- Windows Server: This is the full Windows Server OS for containers, and it provides the full Windows API set.
- Windows IoT Core: Finally, IoT Core is designed for small footprint IoT applications. Additional information on the purpose of IoT Core for containers is available on the Windows blog.
Once you’ve determined the most suitable container image for your use case, you can continue.
Installing Windows Nano Server via Docker and PowerShell
After preparing your Windows Server and installing Docker, you can create a container image. In this example, we are installing Windows Nano Server.
Ideally, you should verify your Docker installation using this Docker for Windows guide before continuing in order to ensure that everything is configured correctly. The guide covers how to test your Docker installation and explores both CLI and GUI-based Docker functionality.
To get started, open a Command Prompt window and run the following command:
docker run mcr.microsoft.com/windows/nanoserver:1903
Within Powershell, Docker will generate an output stating the following:

Then Docker will start downloading the Nano Server container image. If you have a local copy of the container image, this ‘Unable to find image’ message will not appear.
Verifying the Nano Server Container Image Has Been Installed
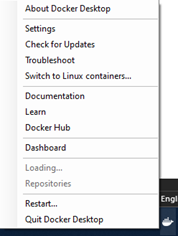
You can check that the Nano Server container image has been installed in the Docker GUI application by clicking the Docker taskbar icon and selecting Dashboard:
You should see an image in Docker with a randomly generated name:

You can also check for installed container images as shown below.
docker container ls -all
This will list all containers, whether they are running, paused, stopped, or exited.
You should see a similar output, as shown in this example:

Containerizing a .NET Core App Using Nano Server Containers in Powershell
To containerize a .NET Core app, you will need to have the Git source control system installed as a prerequisite. Microsoft provides sample source code for .NET Core in this Git repository, which we will use for testing. The folder name is windows-container-examples.
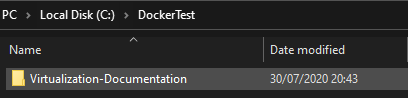
First, open up PowerShell and run Set-Location -Path ** to select the directory in which you would like to store the repository. Before this, we created a folder on our C drive called DockerTest:

You can clone the repository to your current directory with the following command:
git clone https://github.com/MicrosoftDocs/Virtualization-Documentation.git
The repository has now been downloaded to your chosen directory. Next, use the following command to navigate to the sample directory:
Set-Location -Path
Virtualization-Documentation\\windows-container-samples\\asp-net-getting-started
Then create a new DockerFile for the project:
New-Item -Name Dockerfile -ItemType file
Locate this Dockerfile file with File Explorer and open the file using a text editor like Notepad++.
Copy the following and save it to the file:
FROM mcr.microsoft.com/dotnet/core/sdk:2.1 AS build-env
WORKDIR /app
COPY *.csproj ./
RUN dotnet restore
*COPY . ./*
*RUN dotnet publish -c Release -o out*
*FROM mcr.microsoft.com/dotnet/core/aspnet:2.1*
*WORKDIR /app*
*COPY –from=build-env /app/out .*
*ENTRYPOINT [“dotnet”, “asp-net-getting-started.dll”]*
While Microsoft covers how this code works in this tutorial, for our purposes, we are simply looking to containerize an app to test Docker and Windows containers.
Next, we can build and run the app using this Docker file.
Input and execute the following:
docker build -t my-asp-app
Once complete, you should see the output below:

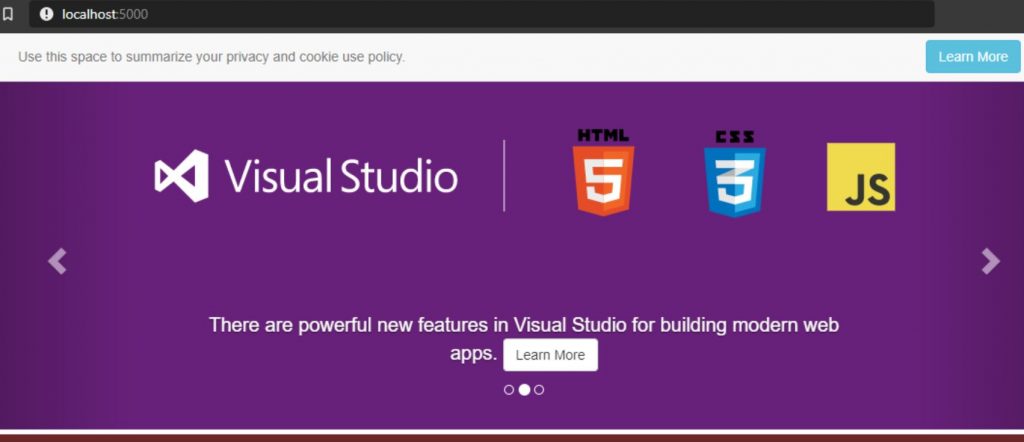
The app has been tagged as my-asp-app, which is the name we should reference next. Now, execute the following command to run your Windows Docker container app:
docker run -d -p 5000:80 –name myapp my-asp-app
If you open the Docker GUI, you should see your application is running:

The port is 5000, so type in “http://localhost:5000” to open the app in your browser.
You’ve just successfully created a Windows container in Docker, running a test .NET Core application.
The Future of AKS and Windows Containers
Configuring and installing Windows Docker containers is relatively simple. This is supplemented by the Azure Service Fabric, Microsoft’s own container orchestrator. This Azure native service simplifies K8s container orchestration and deployment on microservices-based architecture, allowing for more agile development practices and better service resilience.
While creating and deploying Windows containers is simple, the technology is still in its infancy. For business-critical workloads, using more established container technologies is therefore recommended.
Microsoft, however, has been heavily investing in the development of its Windows container technologies and AKS. Thus, while Linux may still have the edge over Windows when it comes to hosting business-critical workloads on Kubernetes, this may well change in the future as Microsoft makes further Windows container and Azure-related service development progress.
